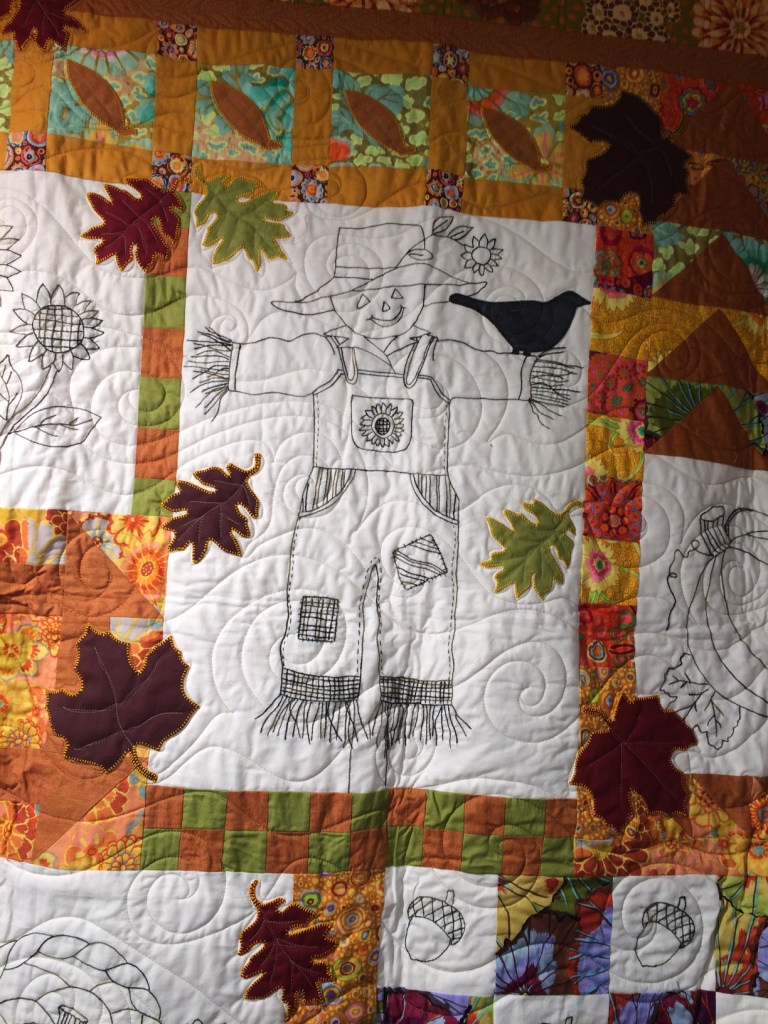
"Annie" is a new pattern I finished this week.
So far I have designed 4 Raw Edge Applique Patterns similar to this one. I just realized that I have not posted them, so I will have to do that.
All of these Raw Edge Patterns have a name that is a person's first name. So, when it came time to name this one I really had to think. I was talking to Chris one day and we were discussing the need for a name for this pattern. The next morning when I woke up I had this thought in my head. Yes, I do have to give the credit to God. I knew the name had to be Annie, Annie Oak Leaf. I hope you get the pun. I laughed out loud.

Making this quilt is really very simple. First you trace the pattern onto the background fabric. Then you stitch on the line with a decorative stitch. I don't know if you can see it in the above picture, but I stitched around the leaf twice. First I stitched a bright yellow/gold. I was very disappointed with this because when I backed up I couldn't see it. Part of the charm in these Raw Edge Quilts is the outline of the stitching.
So, now what do I do. Ripping it out was out of the question, it would be easier to start over. I really didn't want to start over because I didn't want to waste the fabric. I pulled out a bunch of thread and spread them out on the background fabric and squinted. I chose the dark olive green. Now I had to decide, do I stitch the green on top of the yellow, or do I stitch beside it. I chose to stitch beside it and I absolutely love it. Don't you love it when a mistake turns out to be a positive?

Now you simply fill in the shape with fabric scraps. When you get to the outside of the shape you can feel where the edge is because of the decorative stitch.
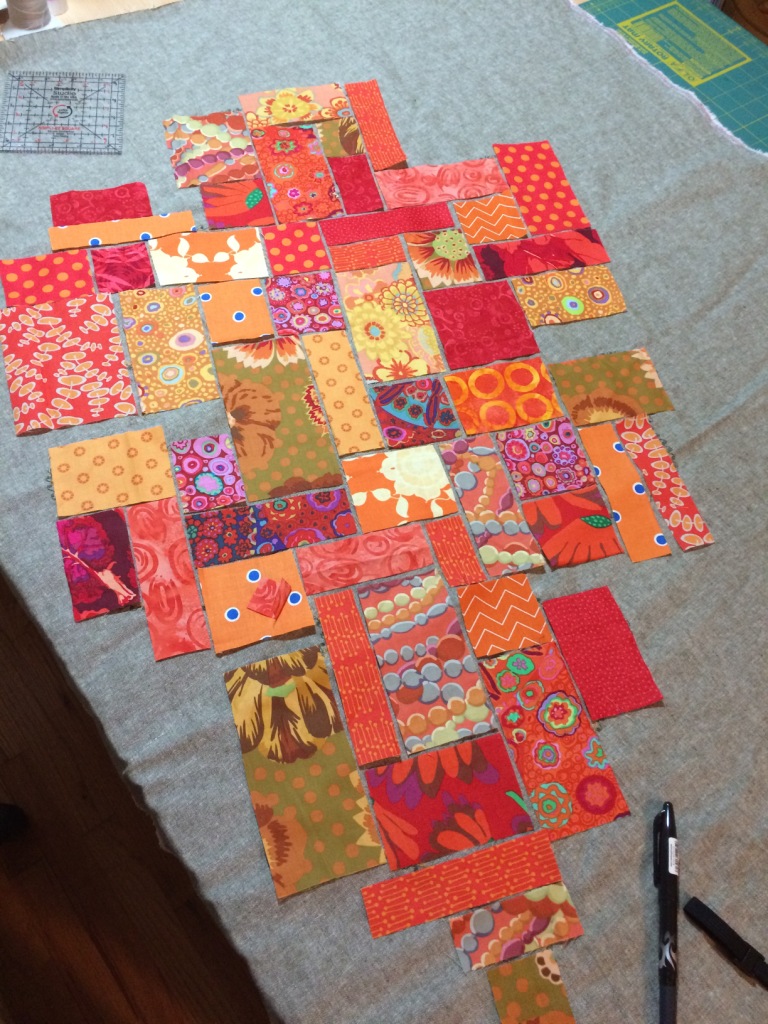
Then I take a Frixion Pen and trace the edge, and cut it to fit. You want to leave a little space between the pieces, about 1/8 to 1/4 inch.

Glue the scraps on with glue stick or Elmer's Glue and press.

Now baste and quilt. I like to stitch around my scraps while I am quilting because that saves a step. You want to stitch the scraps on about 1/8 to 1/4 inch from the edge with a tight stitch and the edges will fray after it is washed

I quilted to background to look like swirly wind.


If you are interested on any of my Raw Edge Quilt Patterns or Kits, I will have them on Etsy very soon. Right now I only have the crab listed.

We have the pattern and the kits in two colors for the crab.
I will post about the crab soon.
HERE is the link to my Etsy Shop.